

Discover the Lion Brand
Lion Premium Grills – HOW TO CONVERT YOUR LION GRILL OR REPLACE THE VALVE?

HOW TO CONVERT YOUR LION GRILL OR REPLACE THE VALVE?
Swapping out a valve on your Lion Premium Grill is essential for safety and peak performance. This guide covers a step-by-step guide & two main reasons you may need a valve replacement: converting the grill’s fuel type (from natural gas to propane or vice versa) or addressing a faulty valve. If you notice ignition issues or that your control knobs are heating up more than usual, it may signal a leak or a malfunctioning valve. In these cases, a prompt replacement is crucial.
Note: We recommend having a licensed plumber perform this valve replacement or conversion. A licensed professional ensures proper installation and minimizes the risk of gas leaks, keeping your grill safe and efficient.
1. Gas Type Conversion: Enhancing Compatibility with Your Outdoor Setup
Whether you’re upgrading your outdoor kitchen or relocating your grill, changing the fuel type can offer greater flexibility. By switching from propane to natural gas or vice versa, you can tailor your grill to match the available fuel source in your environment.
- Convenience in Fuel Choice: Many prefer natural gas for its continuous supply and cost-effectiveness, eliminating the need to frequently refill propane tanks. Propane, on the other hand, offers a high-energy output in a portable format, ideal for mobile setups or remote areas.
- Flexibility for Outdoor Kitchens: For those with built-in outdoor kitchen layouts, matching your grill’s fuel type with the main gas line setup can streamline installation and reduce future adjustments. Converting the valve to the desired fuel type ensures your grill integrates seamlessly with other appliances and eliminates the hassle of dealing with mismatched fuel supplies.
- Extended Use and Cost Savings: Fuel availability and cost can vary, especially if you’re in an area where one fuel is easier or cheaper to access. Switching the valve can allow you to take advantage of the most economical or accessible fuel type, ultimately enhancing the convenience and affordability of your outdoor kitchen experience.
2. Safety Concerns: Preventing Potential Hazards
Safety is a top priority when it comes to grilling. A valve that isn’t functioning correctly poses several risks, from inefficient grilling to more serious hazards like gas leaks. Ensuring that your grill valve is functioning properly is critical for maintaining a safe outdoor cooking environment.
- Identifying Warning Signs: If your grill struggles to ignite or fails to sustain a flame, it may signal a problem with the valve. Additionally, if your control knobs are unusually hot, it’s an indication that gas may be leaking around the valve area, which needs immediate attention.
- Leak Prevention: Malfunctioning valves often lead to small, continuous leaks, which can be a major fire hazard if not addressed promptly. Leaks can occur if the valve’s components become worn or if seals deteriorate over time, both of which can happen with frequent use and exposure to outdoor elements.
- Efficient and Safe Grilling: A properly functioning valve provides consistent gas flow, allowing for even heating and better control over temperature. Replacing a faulty valve ensures that your grill operates at peak performance, reducing the risk of overheating and allowing you to cook safely and confidently.
- Long-Term Durability: Regular valve maintenance or timely replacement extends the lifespan of your grill and safeguards against potential accidents. By addressing any valve issues early, you’ll avoid more extensive repairs or replacements down the road, keeping your grilling setup in excellent condition.
Tools You’ll Need:
- Adjustable Wrench: Essential for loosening and tightening the valve and gas line connections. A wrench with a wide range of adjustability ensures you can handle various sizes of nuts and fittings securely.
- Screwdriver: Both Phillips and flathead screwdrivers may be needed to remove panels, control knobs, or other parts of the grill that cover or secure the valve area. Make sure to use a screwdriver that fits properly to avoid stripping screws.
- New Valve Kit (Specific to Your Grill Model): Obtain a valve kit designed specifically for your Lion grill model, as this ensures compatibility and reliability. Many kits come with the necessary gaskets or seals included, but double-check to confirm everything you need is in the kit.
BUY CONVERSION KITS HERE: L90000 OR L75000 NG TO LP | L90000 OR L75000 LP TO NG
- Thread Sealant (for Gas Fittings): Apply thread sealant (sometimes known as pipe dope) to the valve threads to create a leak-proof seal. Make sure to use a thread sealant that is rated for gas use, as it withstands the pressure and prevents leaks over time.
- Safety Gloves and Glasses: Protect your hands and eyes throughout the process. Gloves provide grip and shield your hands from sharp edges and tools, while safety glasses protect your eyes from dust or accidental splashes of sealant.
- Soapy Water Solution (for Leak Testing): This simple but effective solution will help you test for any gas leaks after the installation. Mix a few drops of dish soap in water; if bubbles form when applied to the connections, it indicates a leak that needs to be addressed.
- Pliers (Optional): Sometimes pliers can be useful for gripping or stabilizing parts as you work. They’re especially handy if there are smaller screws or components that are hard to reach or require additional grip.
- Cleaning Cloth: Before installing the new valve, use a clean, dry cloth to wipe away any dust, debris, or old thread sealant from the gas line and fittings. A clean surface helps the new valve and sealant adhere securely.
Here, we’ve laid out a simple, step-by-step process to help you with converting your Lion grill or replacing a faulty valve, complete with images and instructions.
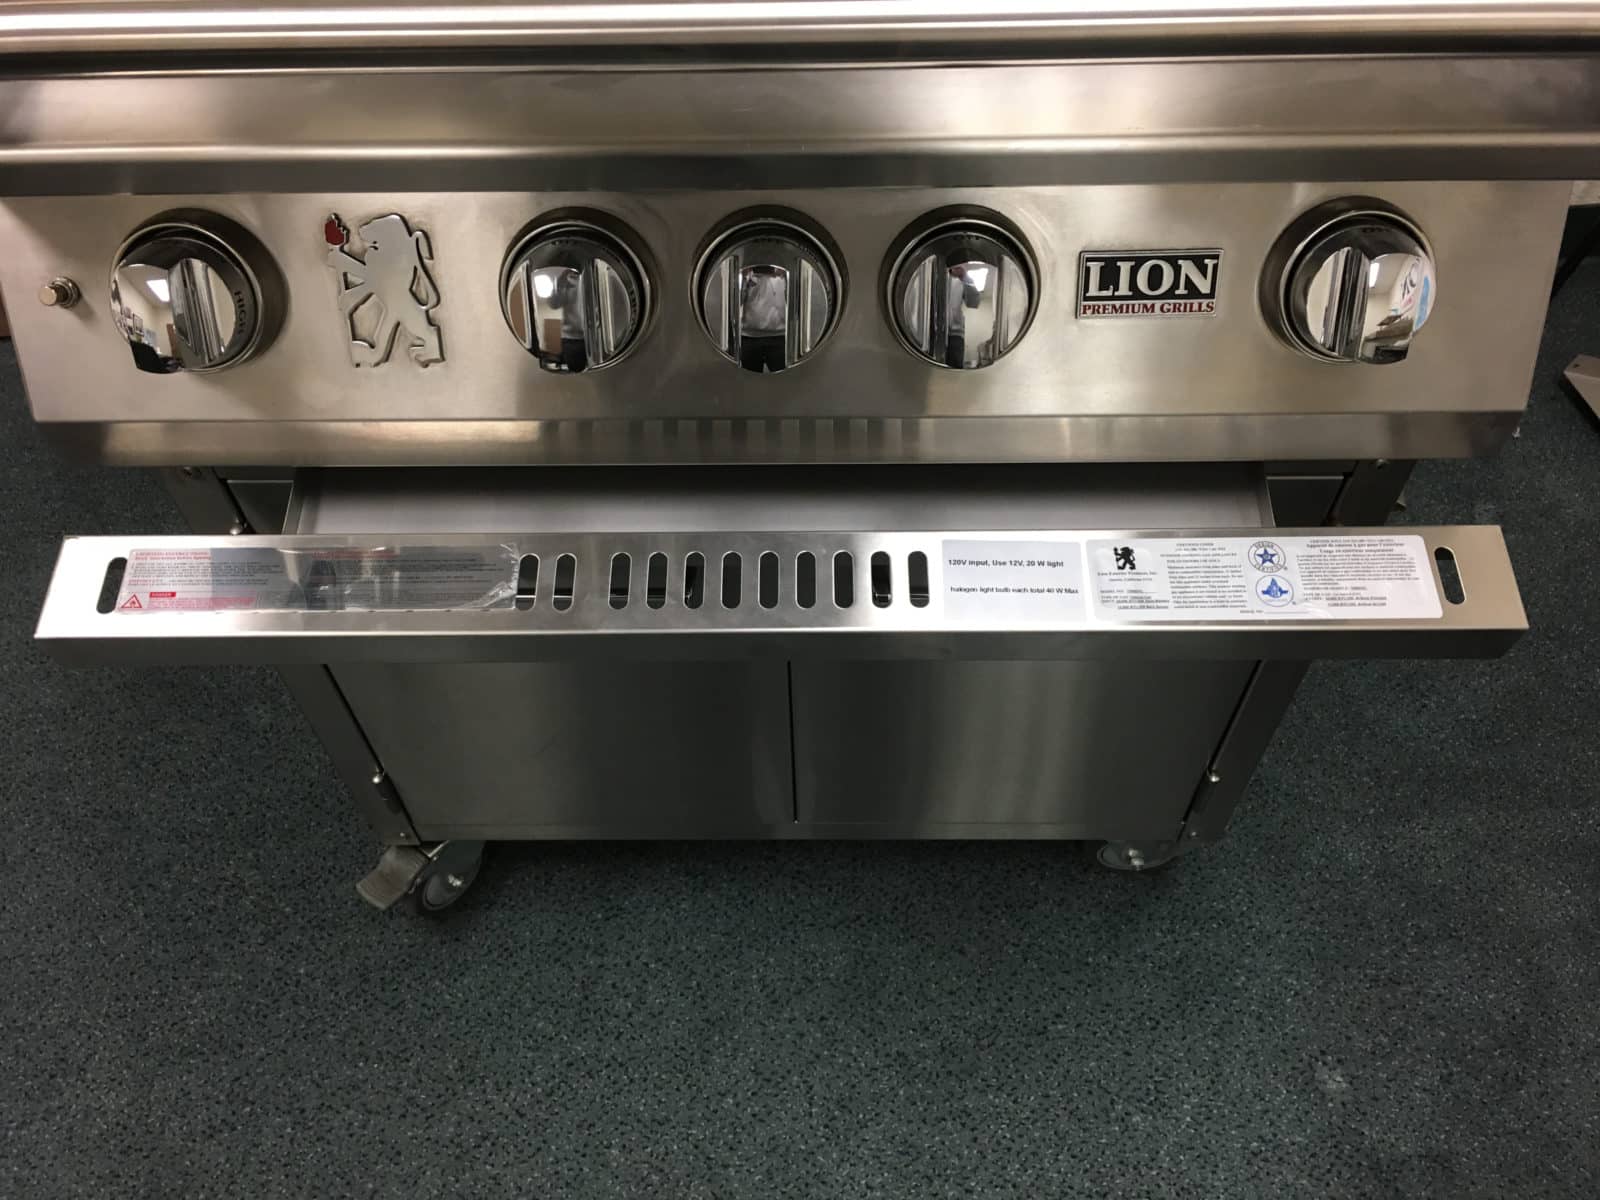
Step 1: Remove the Drip Tray
Begin by carefully sliding out your grill’s drip tray and setting it aside. Removing the drip tray not only clears your workspace but also helps prevent grease or debris from getting in the way during the valve replacement. Here’s how to do it safely:
- Locate the Drip Tray: The drip tray is typically positioned directly under the main grill burners, designed to catch grease and food particles during grilling.
- Gently Slide It Out: Use both hands to grip the edges of the tray, and slowly pull it towards you. Be cautious of any grease buildup; it’s best to keep the tray level to avoid spills.
- Clean the Tray (Optional): While it’s removed, consider taking a few moments to clean off any excess grease or debris. A clean tray ensures smoother reinstallation later and reduces the risk of fire hazards.
- Set It Aside in a Safe Spot: Place the drip tray on a stable surface out of your workspace, so it’s ready for reinstallation once your valve replacement is complete.
Step 2: Remove Control Panel Screws
Next, you’ll need to remove the control panel to access the valves behind it. This is done by carefully unscrewing the screws that secure the panel in place. Here’s a step-by-step guide:
- Identify the Screws: Locate the six Phillips head screws on the control panel—three on each side of the panel. These screws keep the control panel securely attached to the grill.
- Use a Phillips Head Screwdriver: Take your Phillips head screwdriver and carefully unscrew each of the six screws. Turn them counterclockwise to loosen. It’s best to start on one side, unscrewing each one partially before moving to the other side, which helps balance the panel.
- Place Screws in a Safe Spot: As you remove each screw, set them aside in a small container or bag so you don’t misplace any. Keeping track of these screws will make reassembly much easier.
- Gently Loosen the Control Panel: With all screws removed, the control panel should now be loose. Carefully lift or tilt it away from the grill frame to expose the internal components, including the valve connections.
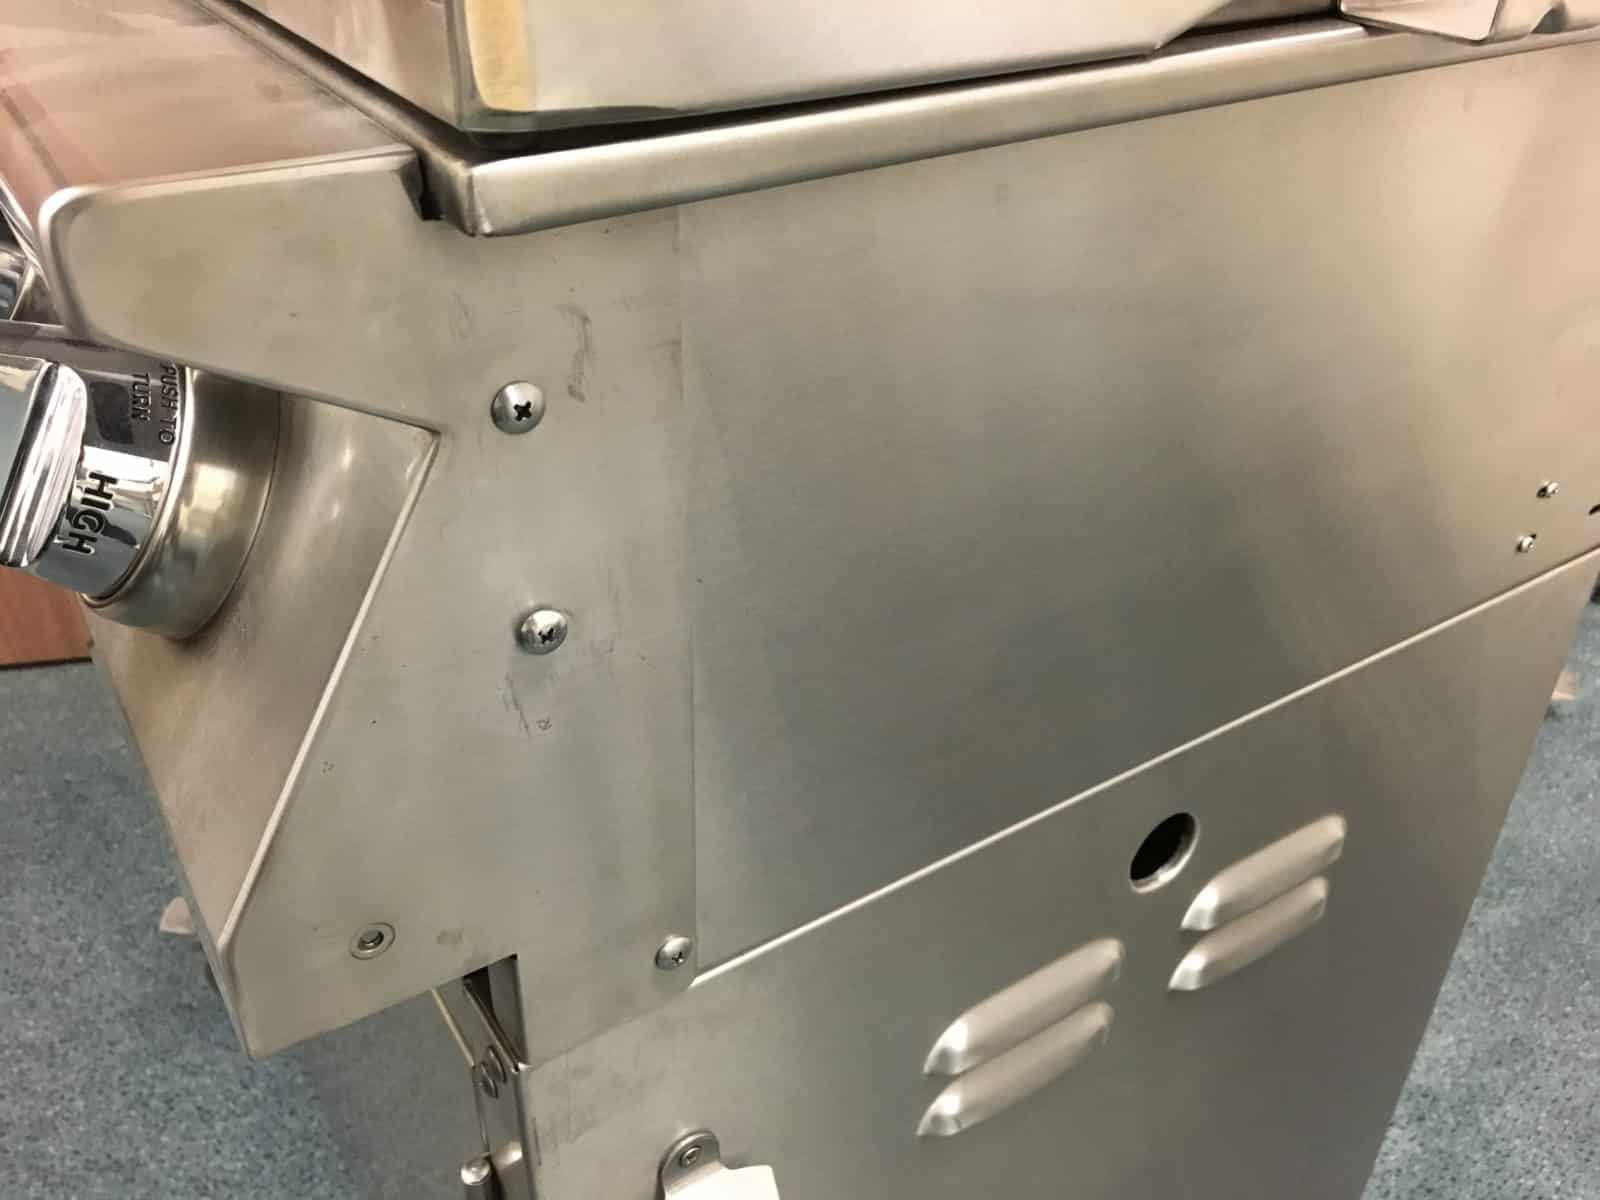
With the control panel detached, you’ll have full access to the valves and can proceed with the next steps in the replacement or conversion process.
Step 3: Take Off the Control Knobs
To proceed with accessing the valve, you’ll need to remove the control knobs and the bezels behind them. This step clears the way to the valves and makes replacement or conversion easier. Here’s how to do it:
- Remove the Control Knobs: Firmly grasp each control knob on the front of the panel and pull it straight off. If they’re tight, a gentle wiggle may help loosen them. Set the knobs aside somewhere safe for reassembly.
- Identify the Bezel Screws: After removing the knobs, you’ll see two screws in each of the now-empty knob positions. These screws hold the bezels (the metal or plastic ring around each control) securely in place.
- Unscrew the Bezels: Using your Phillips head screwdriver, carefully remove the two screws for each bezel. Turn the screws counterclockwise to release them, and set the screws aside with the knobs to keep everything organized.
- Remove the Bezels: Once the screws are out, gently take off each bezel and set them aside. Removing these will reveal the valve and gas line connections behind the control panel.
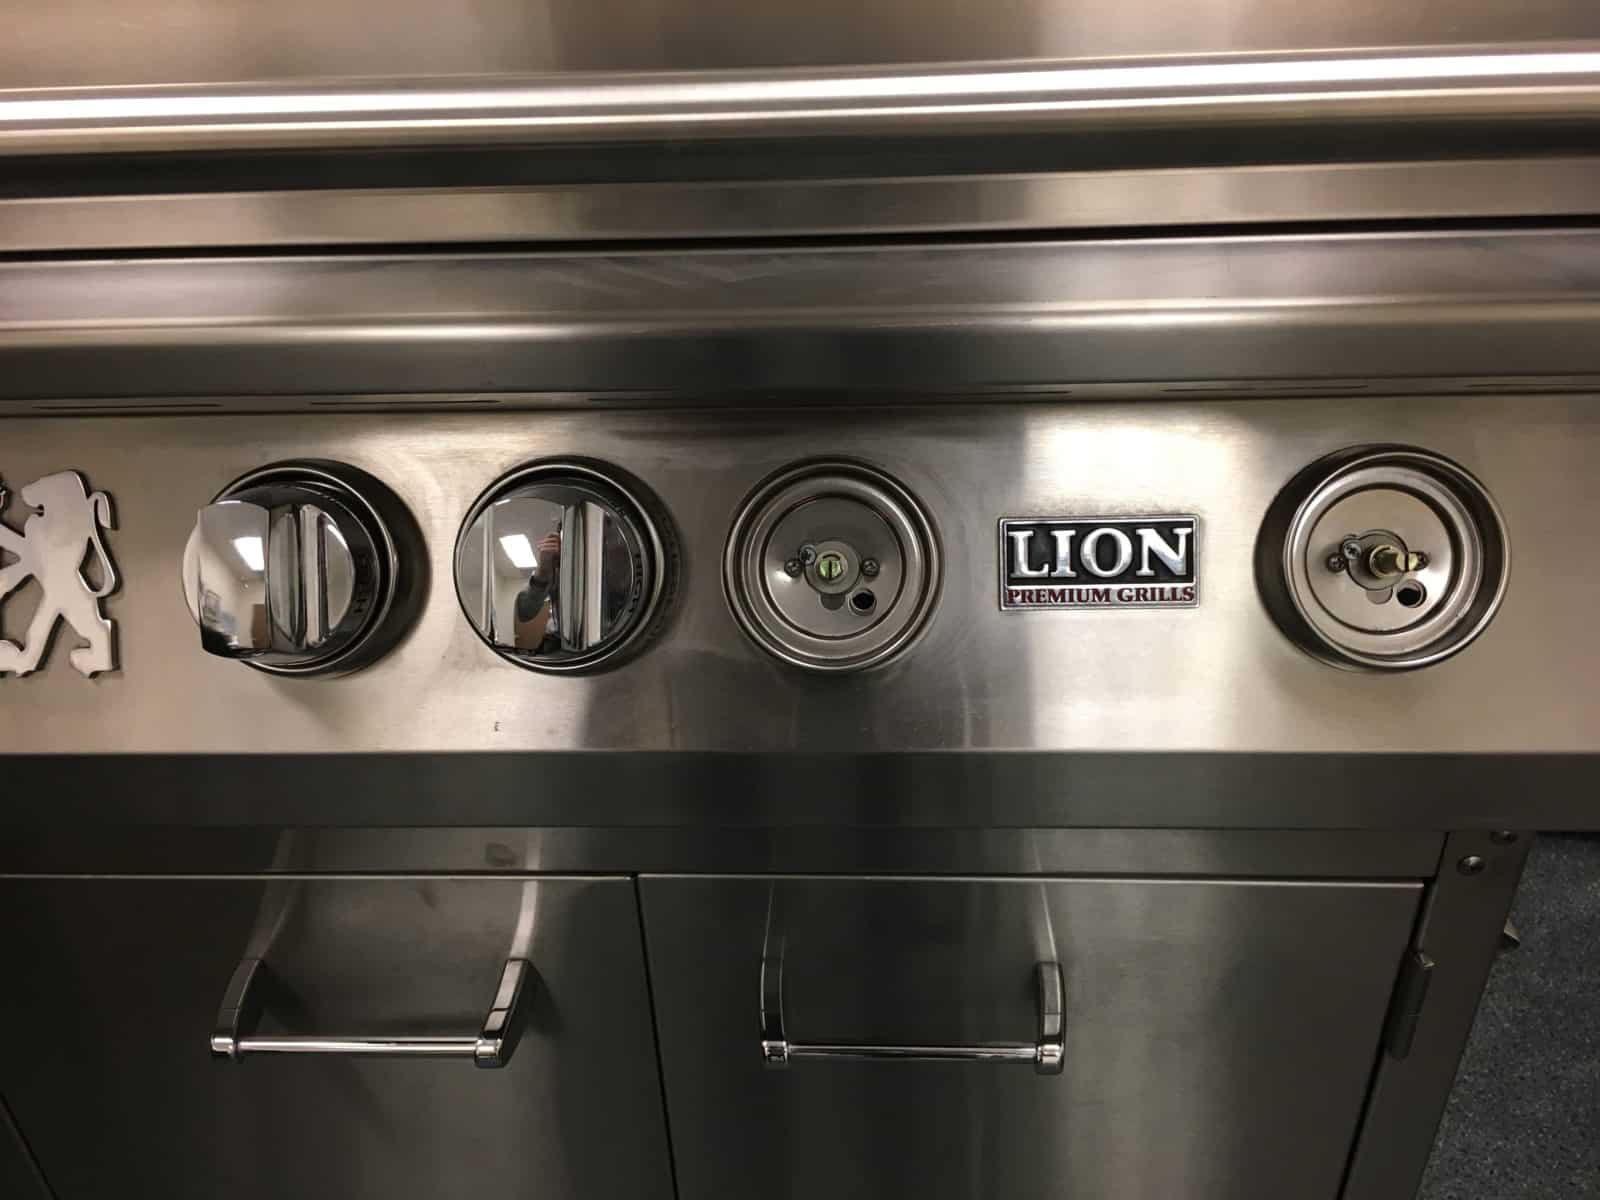
With the control knobs and bezels removed, you’re now one step closer to accessing the valve for replacement or conversion.
Step 4: Remove the Bezel
With the control knobs already taken off, you’re ready to fully detach the bezels from the control panel. Removing these bezels will give you a clearer view of the valves, making the replacement or conversion easier. Follow these steps to ensure the bezels come off smoothly:
- Inspect the Bezel Screws: Each bezel is held in place by screws that you may have already started to loosen in the previous step. Double-check to make sure all screws are accessible and ready to be removed.
- Use Your Screwdriver: Carefully use your Phillips head screwdriver to remove each screw holding the bezels in place. Be cautious not to drop the screws as you remove them, as they can be small and easy to lose.
- Store the Screws Safely: Once removed, place the screws in a safe spot along with the knobs and other small parts. Keeping all screws organized will help make reassembly much easier later on.
- Detach the Bezels: With the screws removed, gently pull each bezel away from the control panel. You may need to lift or tilt them slightly, but they should come off easily without forcing them.
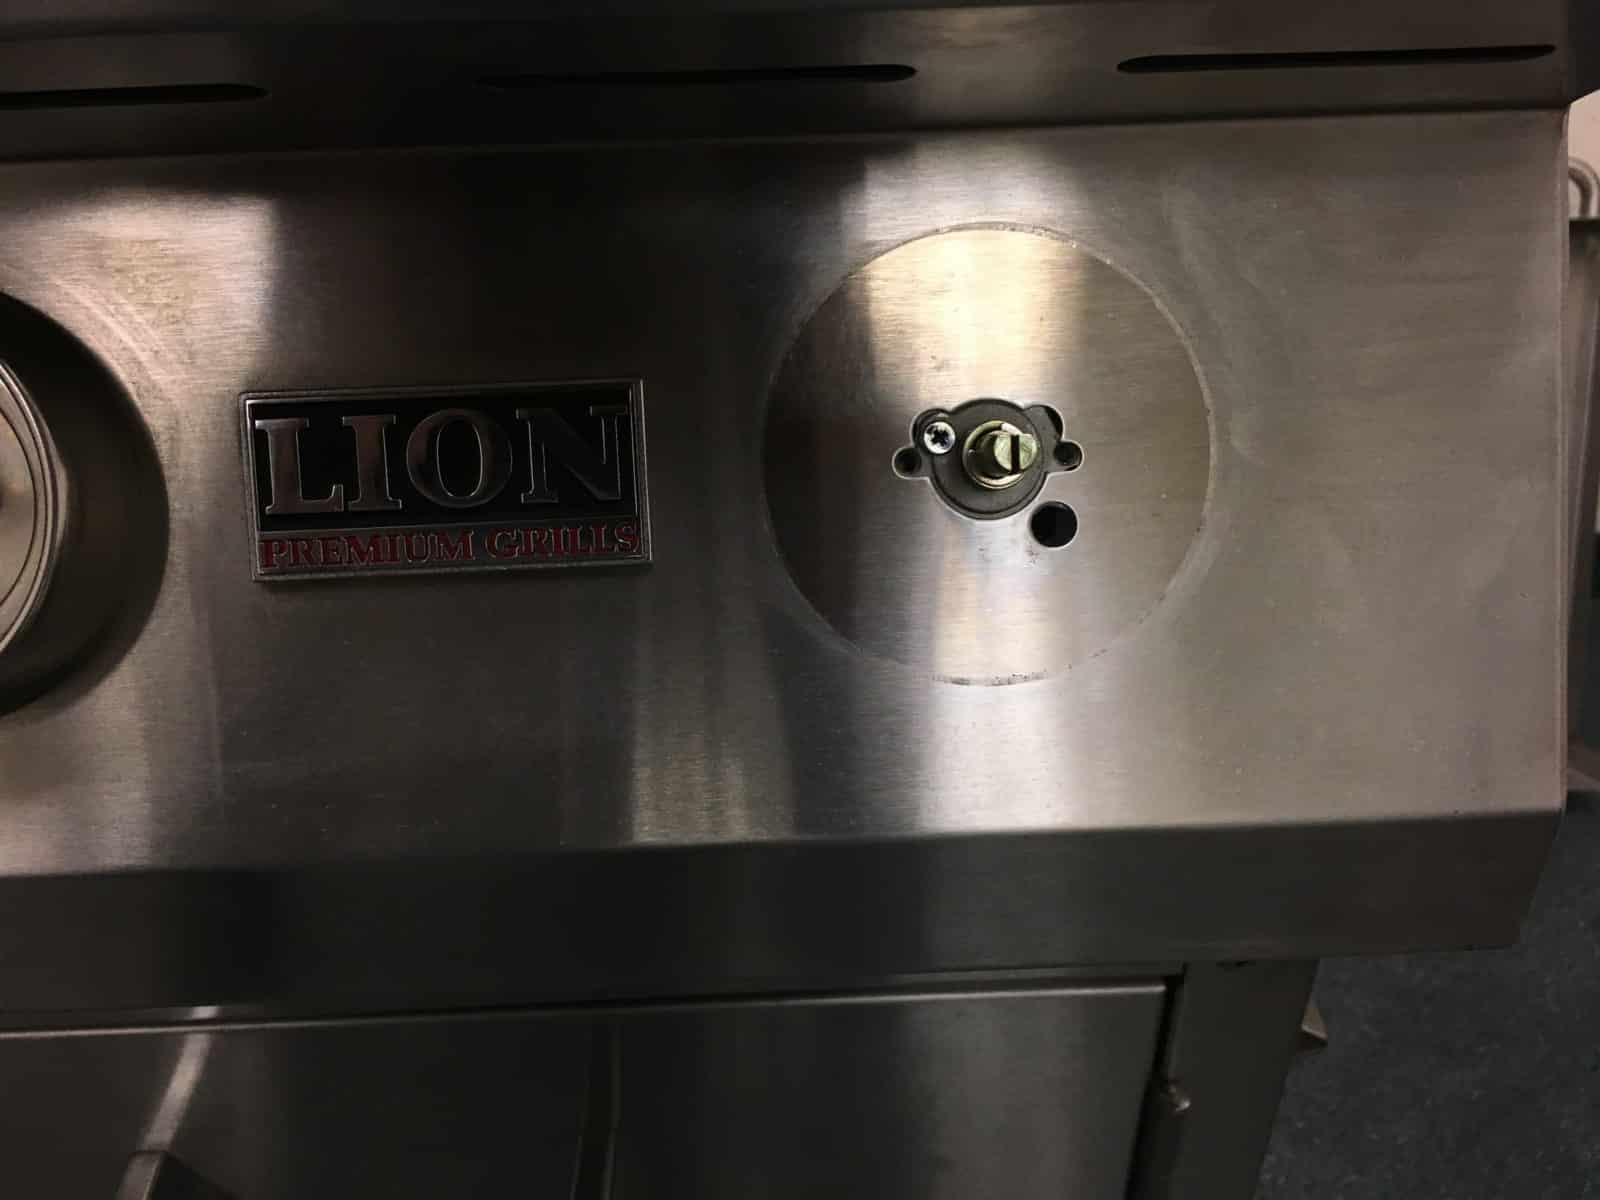
By removing the bezels, you’ll have greater access to the valve area, allowing you to move on to the actual valve replacement or conversion in the next steps.
Step 5: Remove the Control Panel
With all screws, knobs, and bezels removed, your control panel is now free to be carefully detached. Removing this panel will give you direct access to the valves, allowing you to proceed with the replacement or conversion. Follow these steps to safely remove the control panel:
- Check for Any Remaining Connections: Before lifting the control panel, double-check that all screws have been removed and that there are no remaining attachments holding it in place.
- Lift the Control Panel Gently: Carefully lift the panel away from the grill frame. Be cautious as you do this, as there may be wires attached to the back of the control panel that connect to the ignition system or other controls.
- Avoid Straining the Wires: If there are wires still attached, lift the panel just enough to access the valves without putting any strain on the wires. Do not pull or tug on the wires, as this could damage the connections.
- Secure the Control Panel in a Safe Position: If the control panel needs to remain partially attached by wires, find a stable spot where it can rest safely without risk of falling or causing wire strain.
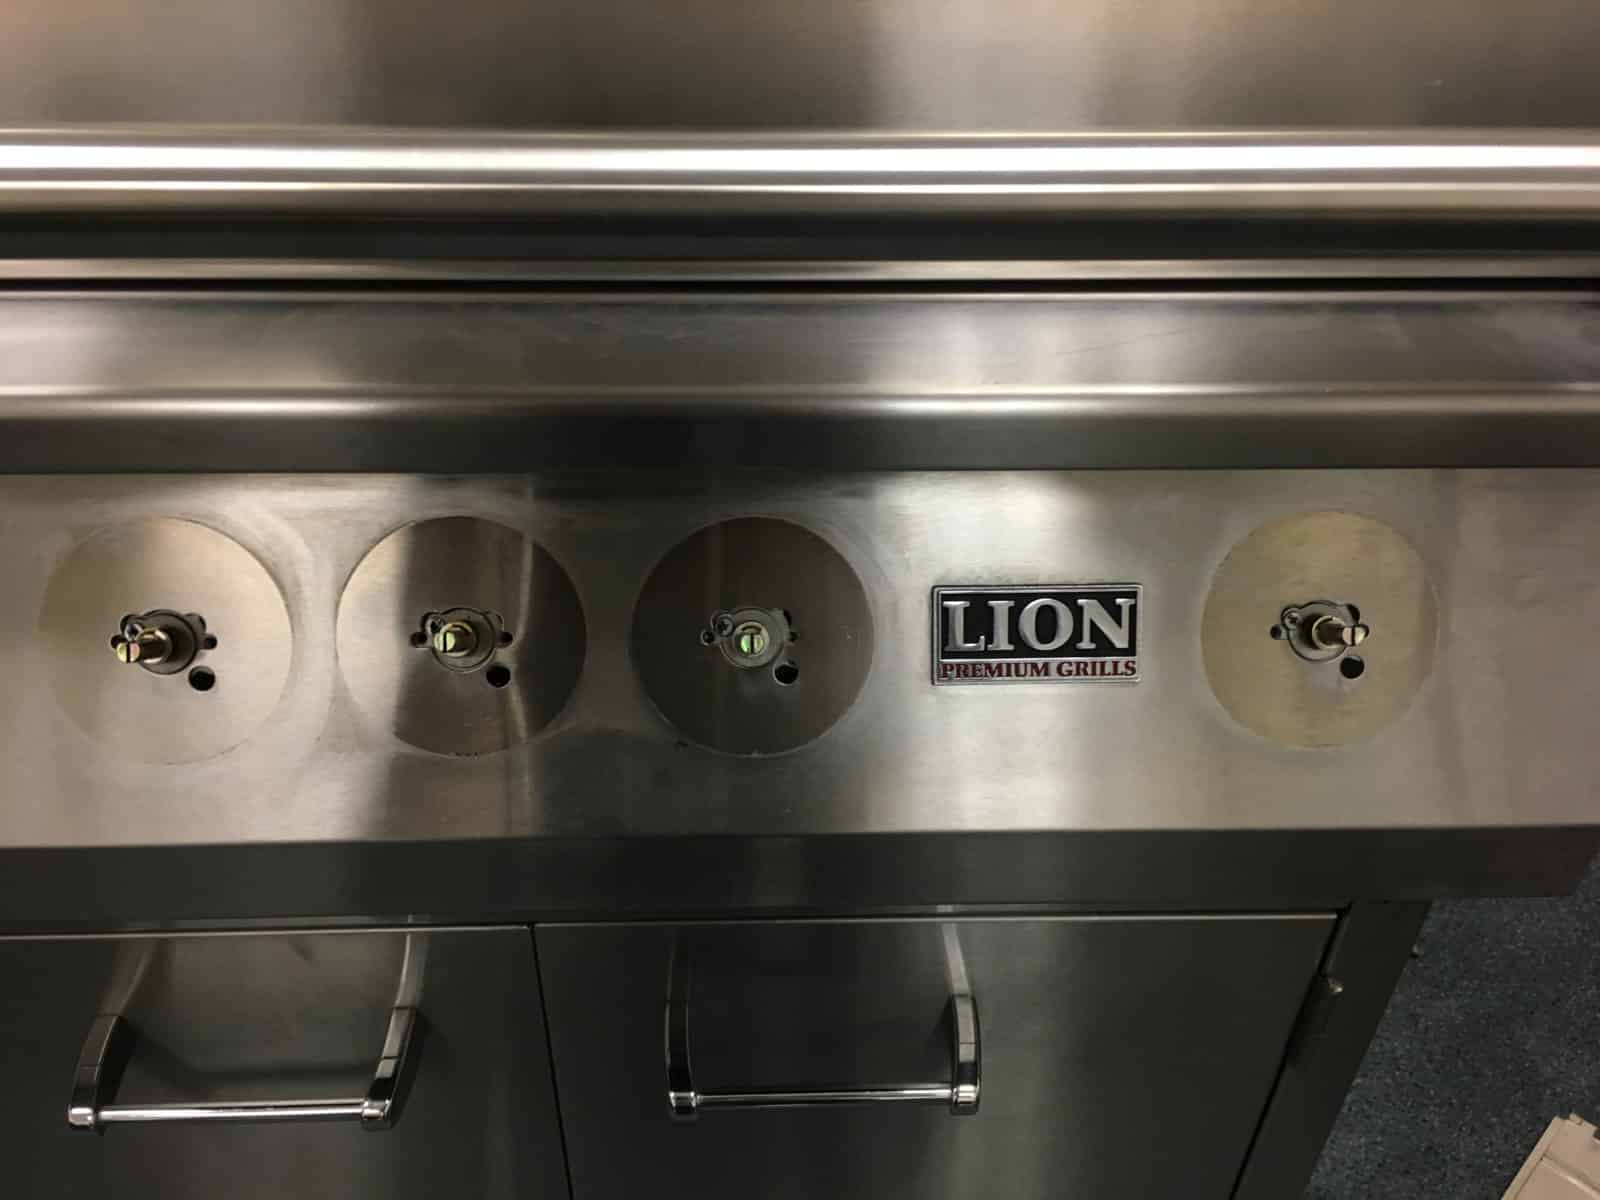
This is what the control panel should look like when it is ready for removal. Be careful to not damage or pull any of the wires when removing the control panel.
Step 6: Exposing the Valves
With the control panel completely removed, you’ll now have full, unobstructed access to the valves. This visibility allows you to inspect, remove, and replace the valves with ease, bringing you closer to completing the replacement or conversion process. Here’s how to proceed:
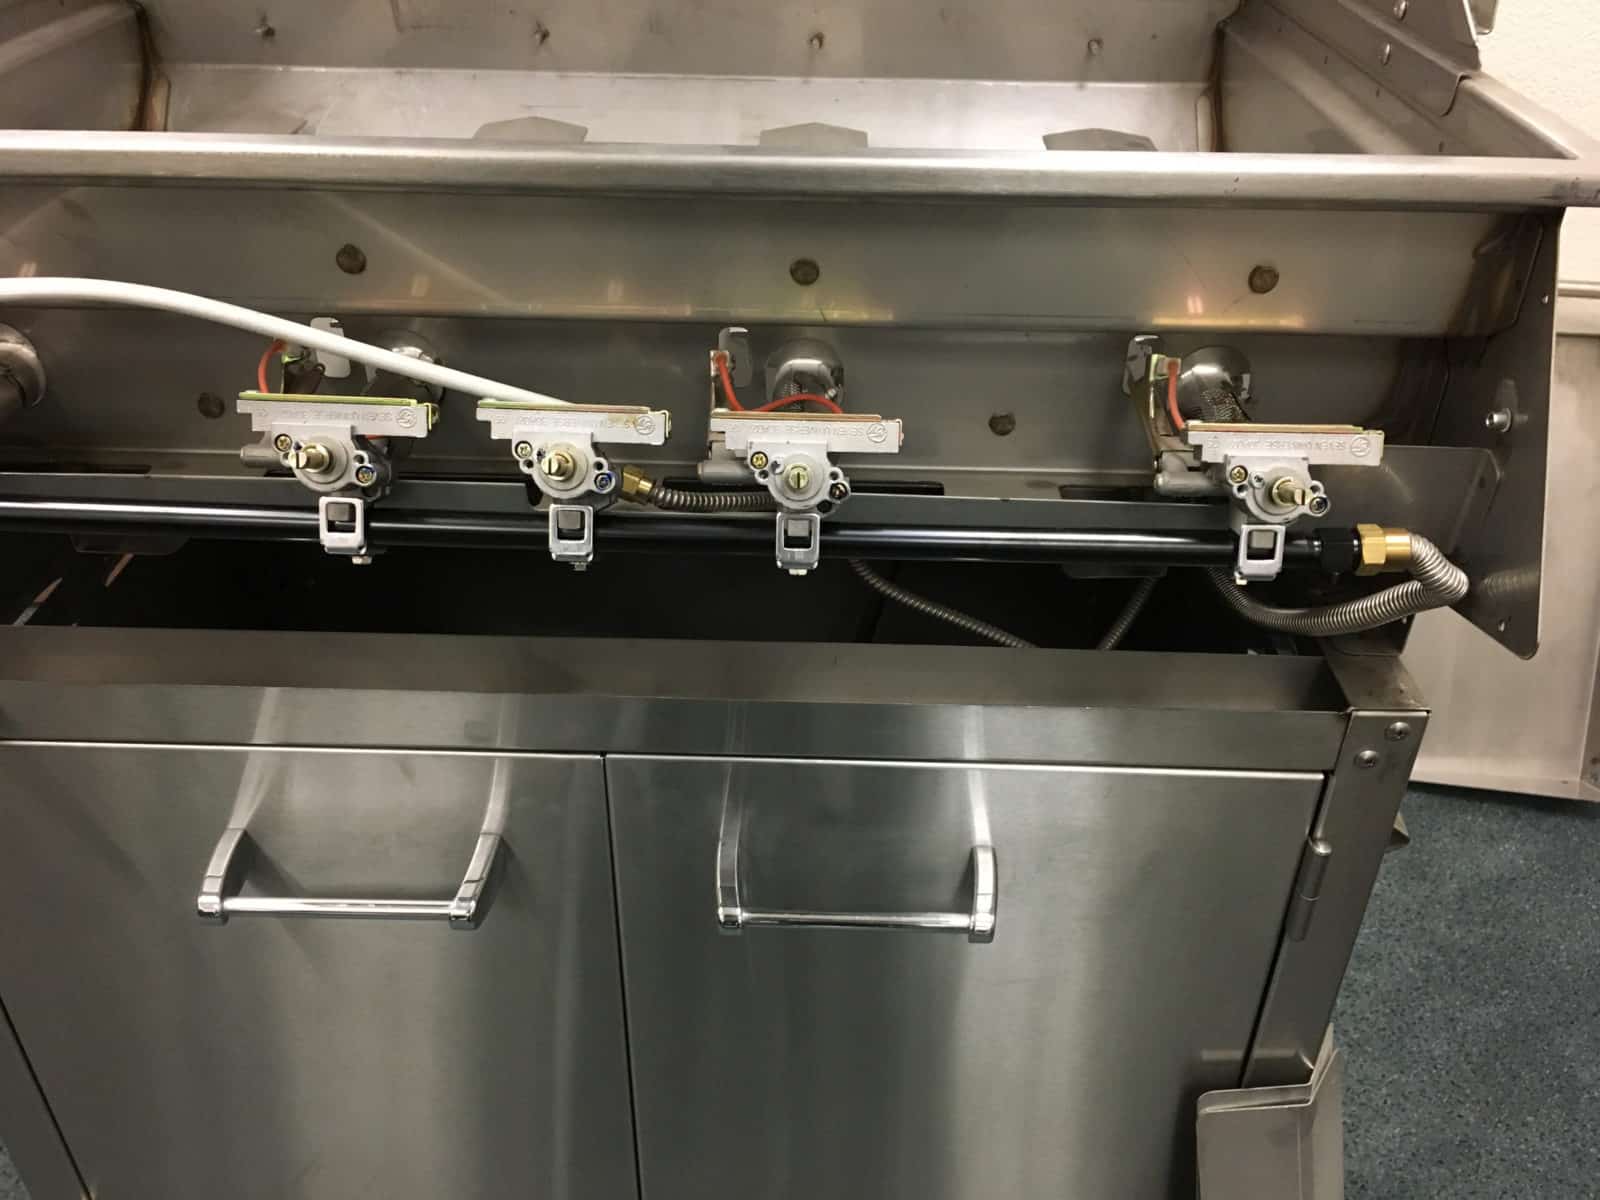
- Inspect the Valves: Take a close look at each valve to ensure you understand the connections and layout. This inspection will help you identify any potential issues and note how each valve is connected to the gas line and other components.
- Check for Wear or Damage: Examine the valves and surrounding gas lines for any signs of wear, corrosion, or damage. This can give you a better idea of what parts may need replacement beyond the valve itself.
- Identify the Valve Connections: Familiarize yourself with how each valve is connected to the gas supply line. This understanding is crucial for the next steps, as you’ll need to disconnect these connections carefully to avoid any gas leaks or damage.
- Prepare for Removal: If everything looks ready, move on to disconnecting the old valve and installing the new one in the next steps.
With the valves now exposed, you’re in the final stages of the replacement or conversion process, setting the stage for a smooth and secure installation of your new valve.
Step 7: Detach the Valve(s)
Now that you have full access to the valves, you’re ready to detach them from the manifold. Follow these steps to safely remove each valve:
- Locate the Valve Clip: Each valve is held in place by a metal clip that secures it to the manifold. This clip typically has a bottom screw that holds the valve securely.
- Use Your Screwdriver: Take your Phillips head screwdriver and carefully remove the bottom screw on the clip. Turning the screw counterclockwise will release the clip and allow you to free the valve from the manifold.
- Keep the Screw and Clip Secure: Once the screw is removed, set it aside with the other screws, knobs, and parts you’ve kept in a safe spot. This ensures you’ll have everything organized when it’s time to reassemble.
- Gently Pull the Valve Away from the Manifold: With the clip and screw removed, carefully pull the valve away from the manifold. Be mindful not to damage any surrounding components or gas lines while doing this.
- Inspect the Connection Point: Take a moment to examine the manifold connection point for any buildup or wear that could affect the new valve’s performance.
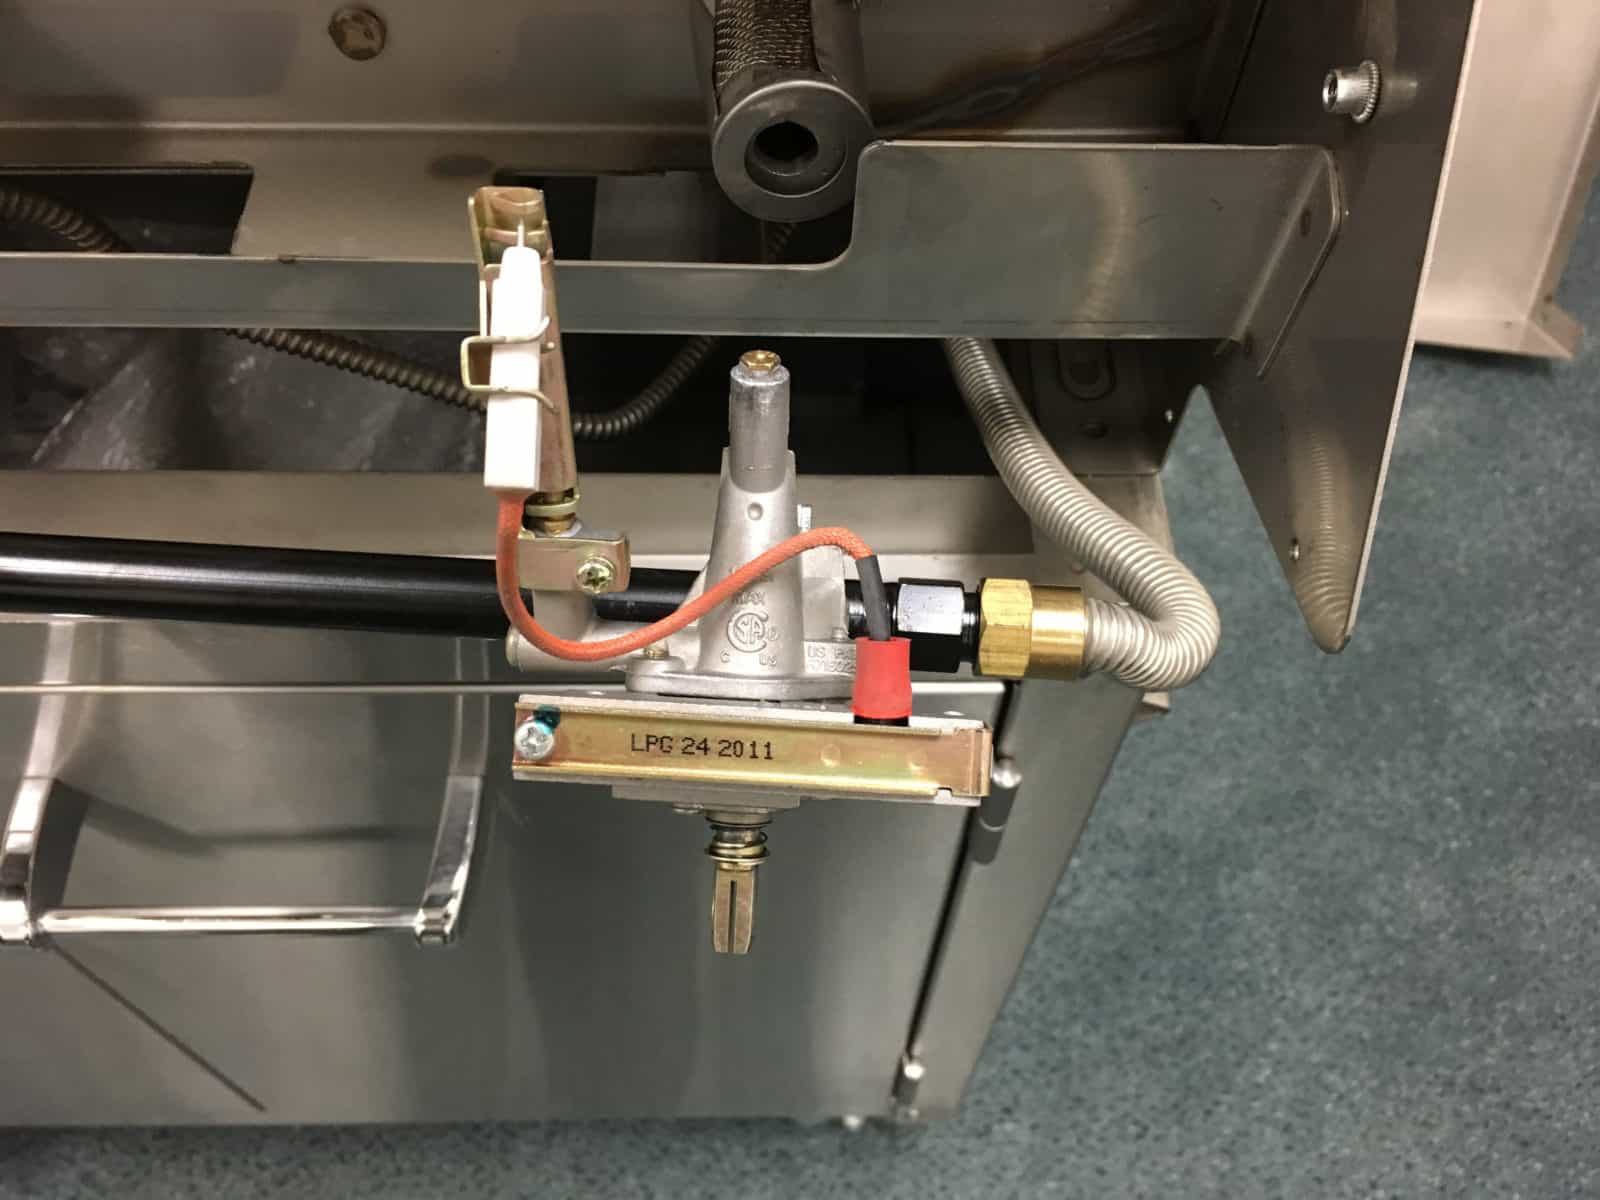
Once the old valve is detached, you’re ready to proceed with installing the new valve, getting closer to completing your replacement or conversion process.
FINAL STEP: Swap Out the Valve
Now that you’ve removed the clip and detached the old valve, you’re ready to replace it with a new one. Whether you’re converting your Lion grill to a different gas type or simply replacing a worn valve, follow these steps to install the new valve securely:
- Remove the Old Valve: Carefully take out the old valve from its position, noting its orientation and how it connects to the manifold. If you’re switching gas types, ensure the new valve matches the appropriate fuel (natural gas or propane).
- Position the New Valve: Place the new valve in the same orientation as the old one, aligning it with the manifold connection. This will help ensure proper gas flow and efficient operation.
- Secure the Valve with the Clip: Use the previously removed clip and screw to fasten the new valve securely to the manifold. Insert the bottom screw through the clip, and tighten it with your screwdriver until it’s firmly in place.
- Double-Check Connections: Before reassembling the grill, make sure the valve is tightly secured to the manifold and that there are no gaps or loose connections. A secure valve is essential to prevent gas leaks and ensure safe operation.
- Reassemble Your Grill: Now that the new valve is installed, reverse the previous steps to reassemble your grill:
- Reattach the control panel. (Secure the bezels and control knobs. Replace any other components like the drip tray)
- Test for Leaks: Once fully reassembled, reconnect the gas supply and turn it on briefly. Use a soapy water solution to check for any leaks around the valve connections. If you see any bubbles, tighten the connections further.
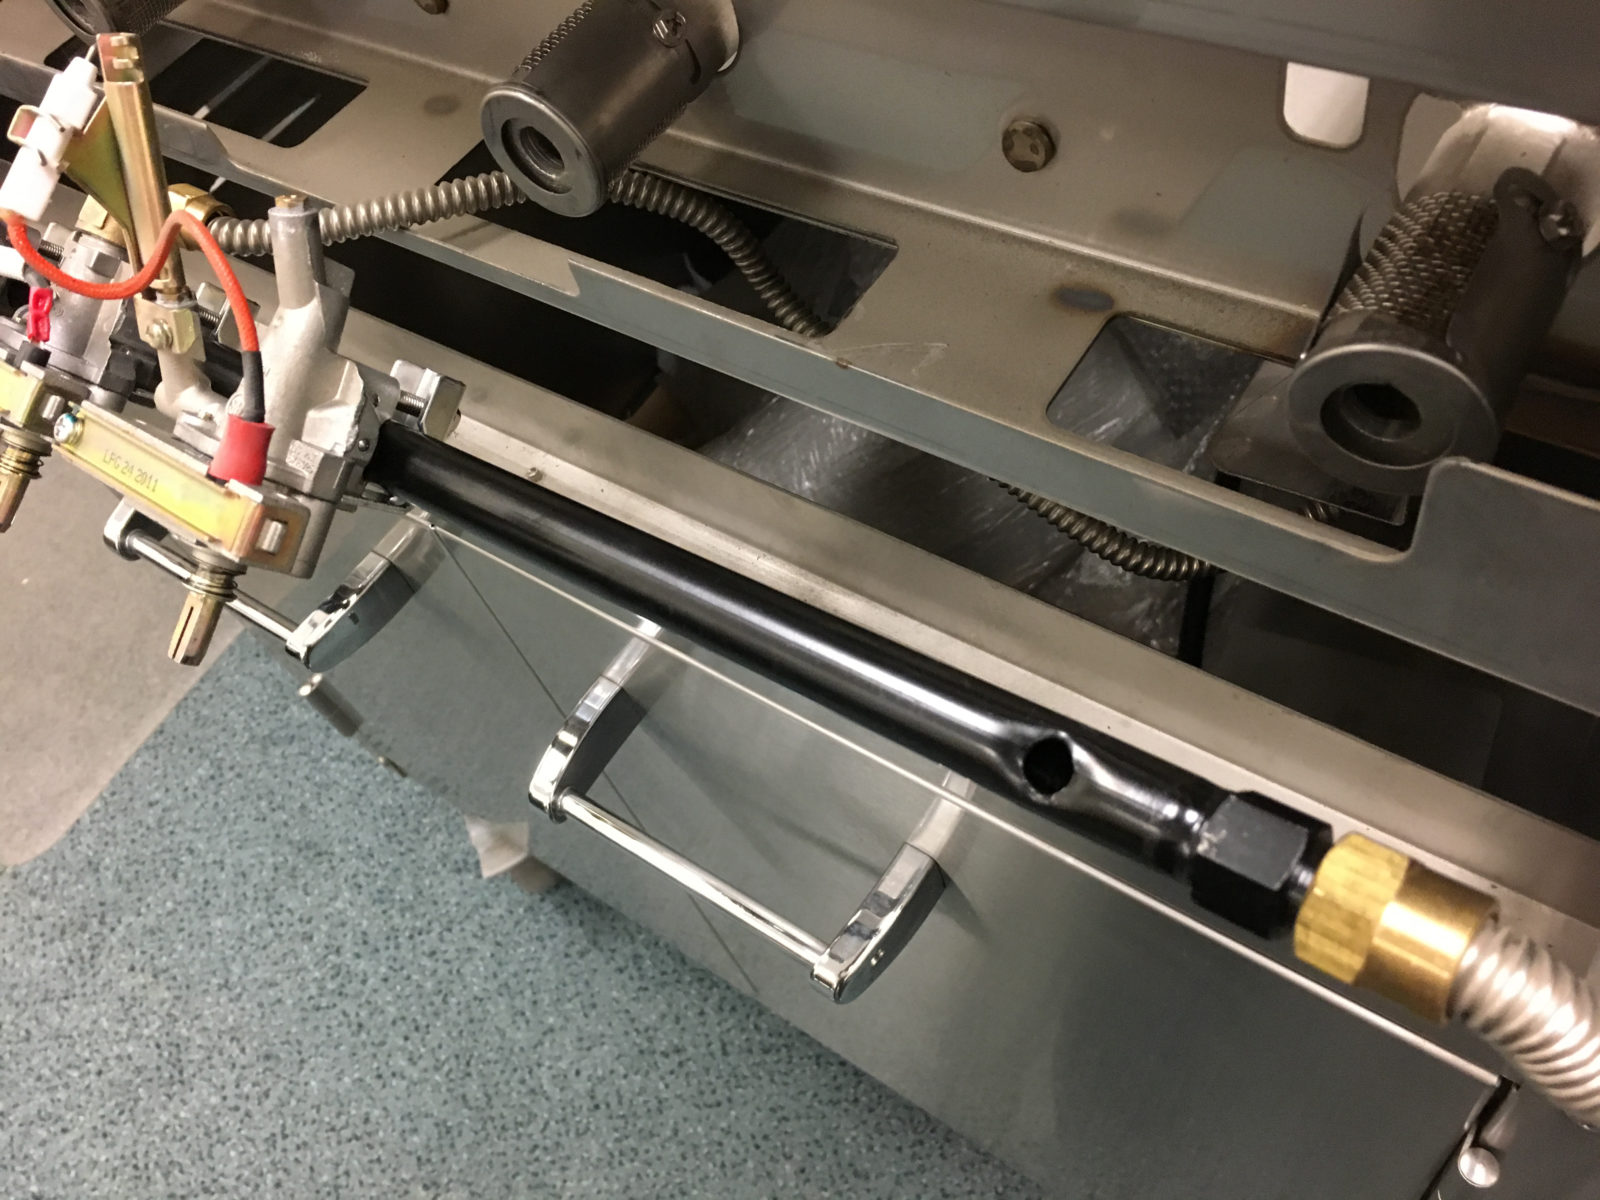
With your new valve in place and the grill safely reassembled, your Lion grill is ready for reliable, safe use. Enjoy your grill with the confidence that it’s optimized for performance and safety!
Final Tips & Support
And that’s it! With these steps, you should be able to safely and effectively switch out any valve on your Lion Premium Grill. This replacement process is essential for maintaining optimal performance, especially if you’re converting fuel types or addressing issues with an aging valve. For safety reasons, however, we recommend having a licensed plumber complete this task to ensure proper installation and prevent any potential gas leaks.
If you have any questions or run into any issues during the process, don’t hesitate to reach out to us! Our team is here to support you every step of the way.
Contact us:
- Phone: 951.977.8222
- Email: info@bestofbackyard
- Hire a Plumber