Discover the Lion Brand
Lion Premium Grills Troubleshooting & Maintenance Guide For your Grill
Lion Premium Grills
Troubleshooting Questions & Proven Fixes
Tip: Always start by shutting off the gas at the source and letting the grill cool before you disassemble anything or run leak-tests.
1. Grill Won’t Light (Clicks but No Flame)
What You’ll Notice:
You turn the knob, hear the clicking, maybe even see the spark — but you don’t smell gas from the burners. If you smell gas but no spark, see #5 instead.
Why It Happens:
Empty propane tank (yes… it happens more often than you’d think).
Air trapped in gas lines after tank swap or new hookup.
Main shut-off valve isn’t fully open (handle should be in line with the pipe).
LP regulator stuck in bypass mode (common if the knob was left on when opening the tank).
NG valve partially closed or shut off completely.
How to Fix:
Keep lid open (always for safety).
Make sure all burner knobs are OFF.
Check LP tank — swap for a known full one if unsure.
NG: Verify shut-off valve is fully open.
LP Reset: Close tank → Disconnect regulator for 1 minute → Reconnect → Slowly open tank valve (¼ turn per second).
Try lighting again — might take 2–3 tries to purge air.
2. Burner Lights But Weak or Blows Out Easily
What You’ll Notice:
Burners light, but flames are lazy, uneven, or blow out in wind or when the lid closes.
Why It Happens:
LP regulator in bypass mode.
Wind gusts hitting the burners.
Kinked, pinched, or blocked gas hose.
Low NG pressure from sharing a line with other appliances.
How to Fix:
Reset LP regulator.
Inspect hose for damage or kinks; replace if needed.
NG: Confirm dedicated, properly sized gas line (½" minimum).
Shield grill from wind or reposition.
3. Grill Heats Slowly or Won’t Reach High Temps
What You’ll Notice:
Even after 20 minutes on high, temperature won’t get past 500°F.
Why It Happens:
Low or empty propane tank.
Regulator limiting gas flow.
NG pressure drop due to other appliances.
Burners partially clogged.
NG line too small for BTU demand.
How to Fix:
Replace LP tank with a full one.
Perform LP reset.
Clean burner ports with a wire brush.
NG: Ensure ½" dedicated line with no T-splits.
Check flame color — should be steady blue with slight yellow tips.
4. One Burner Won’t Light or Stays Cooler
What You’ll Notice:
Only one burner has trouble lighting or produces noticeably less heat.
Why It Happens:
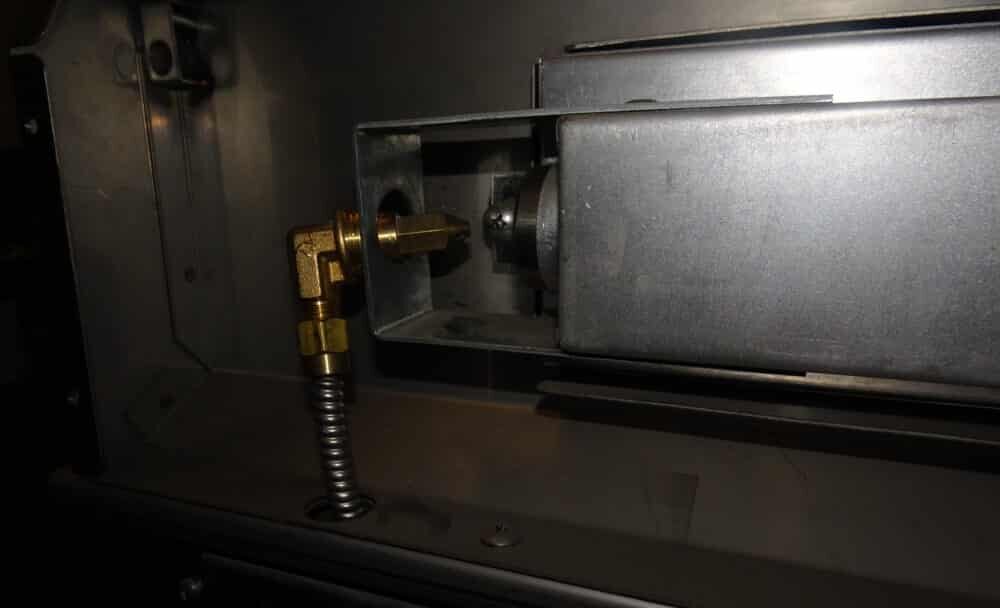
Burner not seated properly on the gas orifice.
Orifice or venturi tube blocked.
Spiders or insects nesting inside burner tubes.
How to Fix:
Turn off gas and let grill cool.
Remove grates and flame tamers.
Lift burner out, clean ports with a wire brush.
Clear venturi tube with compressed air or pipe cleaner.
Reseat burner correctly and test.
5. No Spark When Turning Ignition Knob
What You’ll Notice:
You smell gas, but turning the control knob produces no clicking or visible spark.
Why It Happens:
Worn piezo igniter in the valve assembly.
Loose or disconnected ignition wire.
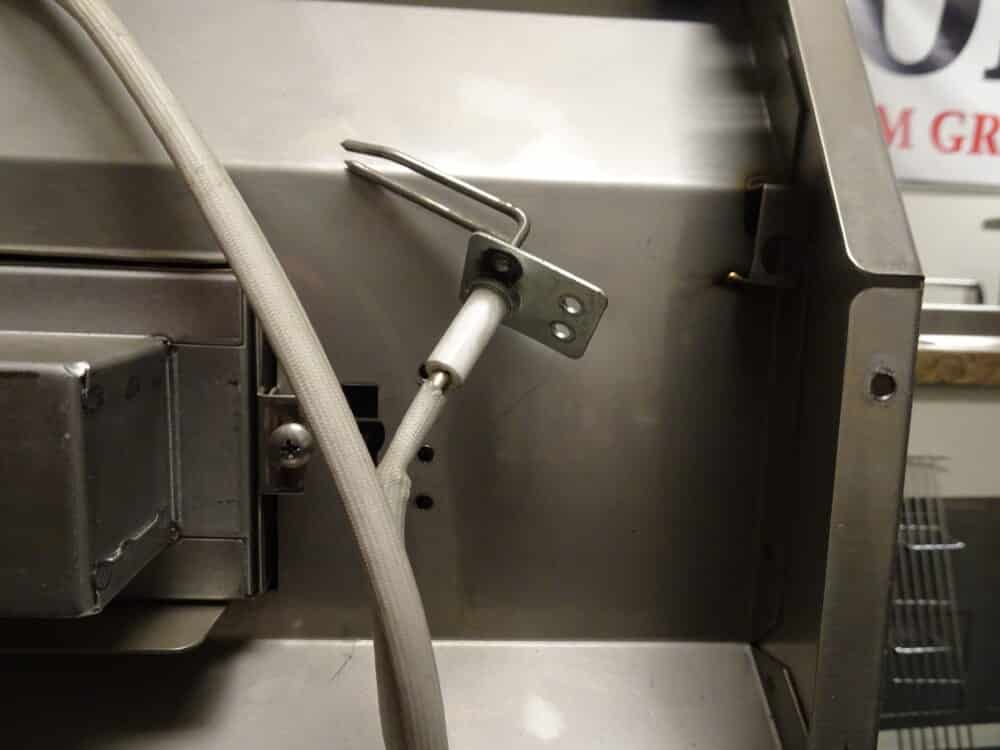
Dirty or cracked electrode.
How to Fix:
Remove grates/flame tamers for a clear view.
Turn ignition knob while watching electrode — look for spark.
Clean electrode tip and check wire connections.
Replace electrode or valve assembly if necessary.
6. Rotisserie Burner Won’t Light or Stay Lit
What You’ll Notice:
You press and hold the rotisserie control knob, but nothing lights — or it lights briefly, stays blue, and never turns that nice glowing orange.
Why It Happens:
Gas line to the rotisserie takes longer to fill (especially after not using it for a while).
Low gas pressure if main burners are on at the same time.
Ceramic surface is dirty or blocked.
Wind blowing flame away from the burner face.
How to Fix:
Keep main burners off when lighting the rotisserie — give it all the pressure.
Hold control knob IN for 5–8 seconds before lighting to allow gas flow.
Once lit, let it run 3–5 minutes to heat the ceramic.
If still not lighting, clean the burner face gently with a soft brush.
Use in a more wind-protected location if flame keeps going out.
Pro Tip:
If you’re new to rotisserie cooking on a Lion, be patient — this burner takes longer to heat up than the mains.
7. Fire Inside Burner Tube (Flashback)
What You’ll Notice:
A loud roaring sound from inside the grill, with flames shooting from unusual spots like the control panel or burner base.
Why It Happens:
Insects (usually spiders) clogging the venturi tube.
Burner misaligned with the gas orifice, allowing gas to ignite inside the tube instead of at the ports.
How to Fix:
Shut off gas immediately at the source.
Let the grill cool completely.
Remove the affected burner and inspect inside the tube.
Use a long, flexible brush or compressed air to clear debris.
Reseat burner correctly and test before full cooking use.
Safety Note:
Don’t keep running the grill during a flashback — it can damage burners and valves.
8. Grease Fire in the Firebox
What You’ll Notice:
A small flare-up suddenly turns into a full-on fire under the grates. Flames may shoot out of the lid gaps.
Why It Happens:
Grease tray or drain is full.
Cooking fatty foods on high heat.
Using foil to line the grill bottom (traps grease).
How to Fix (While It’s Happening):
Turn OFF all burners.
Shut off gas at the tank or valve.
Keep the lid closed to starve fire of oxygen.
Do NOT use water — it will make grease fires worse.
After It Cools:
Remove and clean grease tray.
Scrape drain channels clear.
Clean flame tamers and burner faces.
⚠ Warning:
Grease fires can melt wires, damage valves, and void your warranty. Keep the grill clean and empty the grease tray often.
9. Yellow or Smoky Flames
What You’ll Notice:
Flames are big, lazy, mostly yellow, and leave black soot on food or grates.
Why It Happens:
Blocked burner ports.
Wrong air-to-gas mix.
Grease buildup on burner surfaces.
Spider webs or debris in venturi tubes.
How to Fix:
Run burners on HIGH for 10 minutes with lid closed to burn off residue.
Remove burner and clean with warm soapy water.
Inspect and clean venturi tubes.
Adjust air shutters for proper blue flame with yellow tips.
Pro Tip:
If all burners are yellow, it’s usually air mix or gas quality — not just one burner issue.
10. Burners Sputter or Go Out Mid-Cook
What You’ll Notice:
Burners start strong, then sputter or die after a few minutes — sometimes all at once.
Why It Happens:
Ice forming on propane tank from high demand.
Drop in NG pressure when other appliances are running.
Moisture or debris in regulator or hose.
How to Fix:
LP: Disconnect, purge, and reconnect hose/regulator.
NG: Ensure a dedicated line with proper pressure (7" WC for NG).
Avoid running all burners + rotisserie at max for long periods on small LP tanks.
Install regulator filter if debris keeps clogging flow.
Pro Tip:
If you see frost on the LP tank during a cook, you’re drawing gas faster than the tank can vaporize it — switch to a fresh, full tank.
11. Knobs Are Hard to Turn or Feel Sticky
What You’ll Notice:
Knobs squeak, grind, or feel stiff when turning — sometimes sticking halfway between OFF and HIGH.
Why It Happens:
Grease, food particles, or dust buildup around valve stems.
Weather exposure causing minor corrosion.
Dried factory grease on valve stem.
How to Fix:
Make sure the grill is cool and gas is OFF.
Pull knobs straight off (Lion knobs are friction-fit).
Wipe valve stems with isopropyl alcohol and a lint-free cloth.
Apply a very small amount of high-temp silicone grease to the stem.
Rotate valve several times to distribute grease.
Reinstall knob and test smoothness.
Pro Tip:
Avoid spraying WD-40 or oil near valves — it can attract dirt and isn’t heat-safe.
12. Control Panel Gets Too Hot to Touch
What You’ll Notice:
Knobs and stainless faceplate feel uncomfortably hot, especially during long preheats or high-heat cooking.
Why It Happens:
Heat shield behind panel is warped, missing, or installed incorrectly.
Preheating on HIGH for too long.
Direct summer sun heating panel.
In rare cases, a small gas leak near manifold increases heat.
How to Fix:
Inspect and replace heat shield if damaged.
Preheat on HIGH for no more than 10 minutes, then reduce to MED/LOW.
Cook with grill shaded when possible.
Check for leaks at valves using soap-and-water solution — bubbles = leak.
Pro Tip:
A damp towel over the panel during high-heat searing can protect it from direct sun and make knobs easier to handle.
13. Grill Makes Whistling or Hissing Noises
What You’ll Notice:
A high-pitched whistle or constant hiss while burners are running.
Why It Happens:
Gas vibrating inside burner tube.
Air mix slightly off at venturi shutter.
NG hose too narrow or made of restrictive corrugated material.
How to Fix:
Adjust air shutter while burner is lit — small changes can eliminate noise.
For NG, ensure hose is ½-inch inside diameter minimum.
Avoid yellow “dryer-style” flex hoses — they can whistle and reduce flow.
Pro Tip:
If the noise is new after moving the grill or replacing a hose, the culprit is probably the new hose or connection type.
14. Thermometer Reads Incorrectly
What You’ll Notice:
Built-in hood thermometer is way off — sometimes 100°F hotter or colder than actual cooking temperature.
Why It Happens:
Loose mounting nut.
Soot, grease, or moisture affecting probe.
Normal wear — bimetal thermometers can drift over time.
How to Fix:
Tighten mounting nut from inside the lid.
Clean thermometer face and probe.
Test accuracy in boiling water (should read ~212°F at sea level).
Replace if still inaccurate.
Pro Tip:
For the most precise cooking, use a digital probe thermometer — built-in ones are mostly for reference.
15. Excess Smoke at Low Heat
What You’ll Notice:
Thick, white smoke coming from grill even on low settings.
Why It Happens:
Grease tray or drain channel is clogged.
Heavy residue under flame tamers.
Water, leaves, or debris inside firebox.
How to Fix:
Pull and empty grease tray; clean with degreaser.
Scrape flame tamers and burner surfaces.
Clear drain hole and V-channel with pipe cleaner or thin brush.
Run grill on HIGH with lid open for 10 minutes to burn off leftovers.
Pro Tip:
A clean grill runs hotter, produces less smoke, and prevents nasty flare-ups.
16. Burners Light, But Back of Grill Cooks Hotter Than the Front
What You’ll Notice:
Steaks in the back get a great sear while burgers up front lag behind.
Why It Happens:
Natural heat rise toward the rear when the hood is closed.
Rear burners running hotter due to cleaner ports or better airflow.
Flame tamers warped slightly, angling heat backward.
How to Fix:
Rotate and swap cooking grates and flame tamers occasionally.
Clean all burner ports so front burners get full gas flow.
For thick cuts, start them in the back for searing, then move forward to finish evenly.
Pro Tip:
On windy days, rear heat can be even stronger — position food accordingly to avoid overcooking.
17. Sizzling Sound But No Visible Flame
What You’ll Notice:
You hear a faint hiss or sizzling from the burner area, but can’t see the flame clearly.
Why It Happens:
Flame is very low and blue, blending with burner ports.
Burner ports clogged, forcing gas out unevenly.
Lighting in bright daylight can make flames nearly invisible.
How to Fix:
Shade the grill area to see flame better.
Run burners on HIGH with lid open to confirm even ignition.
If flame is uneven, clean the burner ports with a stiff wire.
Pro Tip:
Lion flames should be steady blue with yellow tips — if you can’t see them, it’s usually daylight glare, not a full outage.
18. Grease Tray Fills Up Faster Than Normal
What You’ll Notice:
You find yourself emptying the grease tray after just one or two cooks.
Why It Happens:
Cooking fattier meats without scraping grates between uses.
Using marinades or sauces that drip excessively.
Flame tamers not vaporizing grease efficiently due to blockage.
How to Fix:
Clean flame tamers so they get hot enough to vaporize drippings.
Use a drip pan under very fatty meats like ribs or pork shoulder.
Scrape grates after each use to reduce residue.
Pro Tip:
An overfilled tray can cause flare-ups — check it before every big cookout.
19. Hood Doesn’t Close Evenly
What You’ll Notice:
One side of the hood touches down before the other, or leaves a gap.
Why It Happens:
Grill was moved and shifted frame slightly.
Hinge bolts loosened or bent.
Lid warped from prolonged high-heat cooking with lid closed.
How to Fix:
Inspect hinges and tighten any loose bolts.
Realign lid by gently loosening hinge bolts, positioning hood, then tightening evenly.
Avoid prolonged HI setting with lid closed to prevent warping.
Pro Tip:
Always lift and close the hood from the center handle — pulling from one side twists hinges over time.
20. Flames “Pop” or “Poof” When Lighting
What You’ll Notice:
A small puff or “pop” sound when burner finally ignites.
Why It Happens:
Gas pooling in burner before spark catches.
Ignition delay from clogged port near electrode.
Lighting in windy conditions pushing gas away from igniter.
How to Fix:
Light burners with lid open to avoid gas buildup.
Clean the ignition-side burner ports.
Block wind during ignition, or light a downwind burner first.
Pro Tip:
A little “pop” now and then isn’t harmful, but repeated delays mean you need to clean or adjust the burner near the igniter.
🛠️ Replacement Parts Made Easy
We carry everything you need to get your grill back in top shape.
Not sure which part you need? Just call or message us — we’ll help you identify it quickly and make sure you get the right fit for your specific model (L75000, L90000, etc.).
👉 Browse parts here: lionbbqdirect.com/replacement-parts-and-equipment
🧾 Lion Premium Grills Warranty Info
Your Lion grill is backed by one of the strongest warranties in the industry:
✅ Lifetime warranty on stainless steel housing, cooking grates, and burners
✅ 1-year warranty on flame tamers, gas valves, knobs, lights, and electronics
To ensure your warranty coverage remains intact:
Avoid grease fires by cleaning regularly
Never modify or replace components with non-Lion parts
Save your proof of purchase
Register your grill (if you haven’t already)
⚠️ Note: Damage caused by improper use, grease fires, or unapproved modifications is not covered under warranty.
🔒 Built to Last — Backed by Experts
At Best of Backyard, we’ve helped thousands of grill owners restore, upgrade, and enjoy their Lion grills for years to come. We don’t just sell these grills — we support them long after the sale.
If you need help, just call us. Whether you're a first-time griller or a backyard veteran, we're here to keep you cooking.
🔥 Best of Backyard – Official Lion Premium Grills Dealer
📞 (888) 731-2629
📧 support@bestofbackyard.com
🌐 www.LionBBQDirect.com


